
STEP #1: BED BUG FREE ZONE
Dealing with bed bugs is stressful and time consuming. It’s important to maintain your energy and keep up a positive attitude; and for this, getting a good night’s sleep is crucial. The first thing you will want to do is make your bed a Bed Bug Free Zone, completely free of bed bugs and proofed against re-infestation.
Getting rid of bed bugs is really stressful and time consuming. It’s important to maintain a positive attitude while removing infestations in your home and getting a goodnight’s sleep is key.
The first step is to make your bed a safe zone. This means making sure the area around your bed is free of all bed bugs and protected from re-infestation. Just the knowledge that you aren’t going to get bitten while you sleep will go a long way towards giving you the energy you need to fight your bed bug infestation. In this video we will go through everything you need to know to get rid of bed bugs and make your bed a complete safe zone.
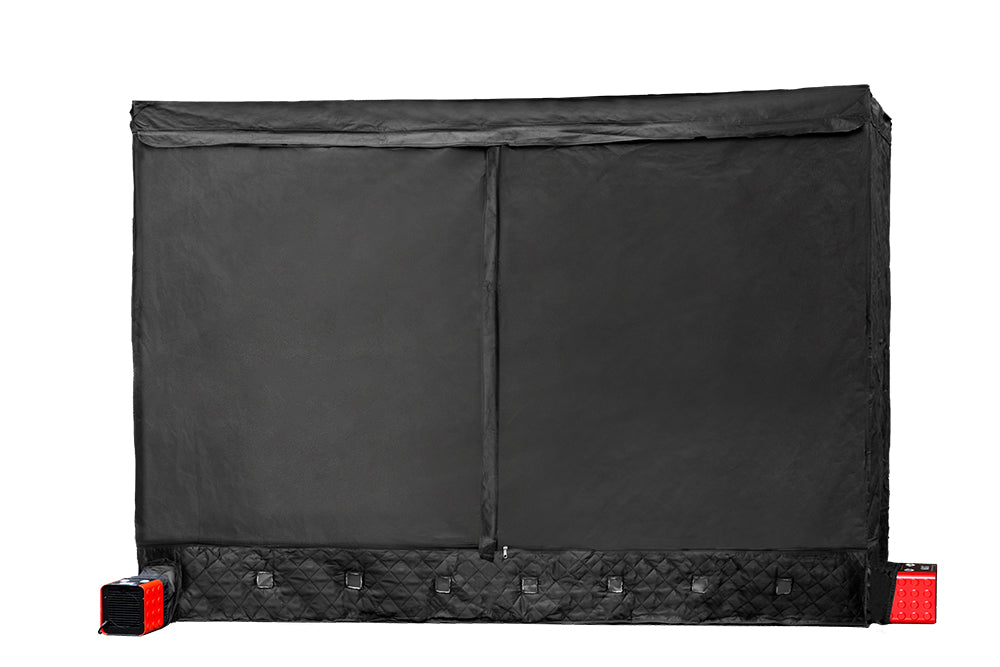
Because heat kills bed bugs you’re going to want to strip off all of your bedding and heat treat it in a Zappbug. The Zappbug heats up to 120 degrees Fahrenheit. The temperature at which bed bugs will start to die within one minute. If your Zappbug is not set up in your bedroom, you’ll want to put your bedding into plastic garbage bags. You don’t want to inadvertently risk spreading infestation as you transport the bedding to the Zappbug.
Put the entire bad of bedding into the Zappbug. Don’t put the bad on the floor and lift the bedding out. Putting the bag in the unit and lifting it away from the bedding keeps the bed bugs contained and prevents them from re-infesting your home. The name of the game is containment.
A bed bug infestation doesn’t mean that you need to throw away your mattress. Mattress encasements have a thin membrane that breathes and also is totally impermeable to bed bugs. There several brands of encasements on the market. Just be sure that your encasement says it’s bed bug proof. Your box spring should also be encased. Bed bugs can live on this as well as your pillows. it’s important to encase everything. This will go a long way towards safeguarding your bed.
FOLLOWING THESE STEPS TO CREATE A BED BUG FREE ZONE
1.1: MOVE YOUR BED AWAY FROM WALL
You need to reposition your bed so it does not touch any walls. This is to prevent bed bugs from getting to your bed by climbing up the wall. This will also give you better sight lines around the bed as you monitor for signs of infestation.
1.2 HEAT TREAT ALL OF YOUR BEDDING
Bed bugs die in one minute at 120F so we highly recommend that you heat treat all of your bedding (including linens, pillows, comforters and blankets) using either a ZappBug product or your home clothes dryer. If you’re using a dryer make sure to set it on high and run it for as long as possible to ensure you’re reaching bed bug killing temperatures, especially when treating large blankets/duvets or other bulky items.
You do not want to rely on your washing machine to kill bed bugs. The washing process itself can help mechanically remove bed bugs but the water temperature of home washing machines may not get hot enough to kill bed bugs. If you do wash, go ahead and set the temperature on hot; but you really want to think of your dryer or ZappBug as the mechanism that will kill bed bugs.
Watch how ZappBug works!

ZAPPBUG HEATER, $229.99Buy Now |

ZAPPBUG
Buy Now
|

ZAPPBUG ROOM, $1695.00Buy Now |
BAG YOUR BEDDING
When you remove your bedding from the bed put all of it into sealed plastic bags immediately. This is to prevent any bed bugs from falling off and spreading when you move your bedding to the ZappBug unit or dryer (be careful if you are using a clothes dryer because it may not get up to a high enough temperature to kill bed bugs).
DE-BAG CORRECTLY
When you are removing your bedding from bags to heat treat it is very important to do so correctly in order to not accidentally spread bed bugs around.
The wrong method of de-bagging is to place your bagged bedding on the floor and then lift out the items for placement in ZappBug or the dryer. As you are lifting items out of the bag, bed bugs can fall off and spread very easily, or bugs that have fallen out into the bag could run out of the bag onto the floor.
If you are using ZappBug, place the entire bag in ZappBug, before removing any items from it. This way if any bed bugs fall off your items as you are lifting them out of the bag, they will fall into ZappBug and be killed when you start the heat treatment.
HEAT TREAT
Heat treating with ZappBug to kill all bed bugs.
If you are using ZappBug to heat treat your bedding, simply follow the directions included with your unit and run for one hour at 120F.
RE-SEAL IN NEW PLASTIC BAGS
After heat treating your bedding be sure to put items into new, unused plastic bags and seal these up.
Do not reuse the bags that you originally had your bedding in before heat treatment. These used bags might contain bed bugs or eggs that dropped off and you don’t want to re-infest your freshly heat treated bedding. Be sure to throw away these used plastic bags.
1.3: ENCASE YOUR MATTRESS AND BOX SPRING (AND PILLOWS)
Encasements are essential in fighting against bed bugs. By sealing in your mattress you protect yourself from any bugs or eggs currently on it and from new populations moving in to your bed. There are now several manufacturers selling Zippered Encasement Mattress Protector that have membranes which breathe, are noiseless (and easy to sleep on) and are guaranteed bed bug proof. We’ve also found encasements available in stores such as Target and even some mattress stores.
Remember to encase both your mattress and box spring. It’s best if you don’t remove the encasements for at least 18 months to ensure that any and all bed bugs are dead.
We also recommend that you encase your pillows if possible. If you’ve heat treated your pillows this step may not be necessary, but it’s an extra precaution that can help. It’s useful after heat treating your pillows while you’re fighting the infestation in the rest of your dwelling in the same way as leaving your treated bedding bagged up while creating your Bed Bug Free Zone.
1.4: TREATING YOUR BED FRAME AND HEADBOARD
Now that you’ve taken care of your bedding and mattress/box-spring you must make sure your bed frame and headboard are bed bug free. Depending on what material these are your treatment options will vary. If you have a simple wooden or metal bed frame you will want to carefully vacuum the entire frame and check all crevices for signs of infestation. If possible you should heat treat your bed frame (see our ZappBug Room for more information).
Some headboards will be much more difficult to treat than others. We recommend that if possible you do not use a headboard which is upholstered with fabric or has a lot of hiding places for bed bugs (for example, a wicker headboard) unless you are able to heat treat. Even with rigorous vacuuming, it is very difficult to ensure that upholstered headboards are bed bug free, because bed bugs can penetrate deep into the upholstery. Also headboards that have a lot of crevices and potential hiding places are a bad idea, because it is very difficult to know for sure that vacuuming has effectively gotten into every nook and cranny. Heat treatment will work in these conditions so if you have an upholstered headboard that you would like to save we highly recommend treating it and then sealing it to prevent re-infestation until your house has been treated.
Once you’ve taken care of your headboard and you’re putting your box spring and mattress back onto the frame we recommend spreading diatomaceous earth between the box spring and mattress. For more information on that see Step 4: Diatomaceous Earth.
ZappBug Room
The ZappBug Room™ is a bed bug heat treatment chamber that uses a thermal chamber to exterminate bed bugs. The ZappBug Room™ has the largest capacity of any portable bed bug heating system available on the market today. Measuring at 80″ x 111″x 57.5″!
1.5: CLEAN THE FLOOR SPACE WHERE YOUR BED WILL GO
IF YOU HAVE AN UNCARPETED FLOOR With bare floors you are going to mechanically remove any possible bed bugs by vacuuming. Follow these steps:
▘Spread diatomaceous earth over the floor area where your bed will be situated. This will help kill any bed bugs that might be lurking around. You can use a pesticide duster to spread the diatomaceous earth or just spread it by hand. For more information see Step 4: Diatomaceous Earth. If you don’t have any diatomaceous earth on hand or feel uncomfortable spreading it you can skip this step.
▘Thoroughly vacuum the floor area, including all of the diatomaceous earth that you just laid down. When vacuuming pay particular attention to thoroughly running the vacuum over any cracks that might be between tiles or floor boards.
IF YOU HAVE AN AREA RUG
Alternatively, you can put the rug into your dryer on high heat for at least 45 minutes. This too is effective heat treatment and will kill any bed bugs. Unfortunately in our experience the backing on most rugs is too stiff to allow folding of the rug into a small enough bundle to get into standard residential dryers. But if you can make the rug fit into your dryer then this is also a great method of heat treatment. Make sure you also vacuum the floor underneath your area rug (see the section on Uncarpeted Floors.) If you’re entirely unable to heat treat your area rug then you’ll want to thoroughly vacuum it and seal it in a bag for at least six months, ideally 18 months, to make sure any bed bugs or eggs on it are dead.
IF YOU HAVE WALL-TO-WALL CARPET
Sadly you cannot put a wall-to-wall carpet in ZappBug for heat treatment so you’re going to need to mechanically remove any potential bed bugs by thorough vacuuming and if possible carpet shampooing. Follow these steps:
▘Spread diatomaceous earth over the portion of the carpet where your bed will go. You can use a pesticide duster to spread the diatomaceous earth or just spread it by hand. For more information see Step 4: Diatomaceous Earth.
▘Thoroughly vacuum the carpet. You will be vacuuming up all the diatomaceous earth you laid down. After vacuuming the carpet, vacuum it a second time. Remember, you want to be very thorough, because you are trying to vacuum up any bed bugs or eggs that might be hidden in the carpet.
Use a carpet shampooer. After vacuuming, clean this area with a carpet shampooer. You are doing this be careful to get any bed bugs that vacuuming might have missed. Like vacuuming, shampooing the carpet won’t kill bed bugs but it will help mechanically remove them.
After Cleaning, Lay Down Additional Diatomaceous Earth
After thoroughly cleaning as we described above, put down some more diatomaceous earth in this area where your bed will go. Your bed is going to cover this area of the floor/carpet anyways, so it won’t be unsightly. Until you get the bed bugs under control, it’s a good extra precaution. If you have shampooed the carpet as described above, remember to first let the carpet dry before laying down additional diatomaceous earth.
1.6: CREATE A PERIMETER AROUND YOUR BED
Think of creating a perimeter as creating a layered defense. You are building several layers of defense to prevent bedbugs from getting back into your bed; if a bed bug manages to penetrate one layer there are still many more between it and you.
We recommend the following:
▪ Do not let blankets touch the floor – This is extremely important. Bed bugs are not good climbers of slick, smooth surfaces but they do climb fabric quite well so don’t them easy access up to your bed by allowing any blankets or sheets to touch the floor.▪
▪ Use Bed Bug Interceptors – Under the feet of your bed frame put bed bug interceptors. These are simple devices that are based on the fact that bed bugs do not climb smooth surfaces well and are very effective as a mechanical barrier to bed bug movement.
▪ Encircle Your Bed With Diatomaceous Earth – If you use a thick enough bead of diatomaceous earth, bed bugs will avoid crawling through it. Put down a circle of diatomaceous earth around your bed to act as a mechanical barrier to prevent bed bugs from crawling into your Bed Bug Free Zone. See Step 4: Diatomaceous Earth for more information. You don’t have to keep this circle of diatomaceous earth around your bed forever. But do keep it in place until you are certain that you have eliminated bed bugs from your home.
1.7: OBSERVE GOOD PROTOCOL & KEEP YOUR BED PROTECTED
It is extremely important to observe very strict protocol in regards to keeping your bed a Bed Bug Free Zone. Although these protocols are likely above and beyond what is necessary we find that with bed bugs you can never be too careful, and knowing that your bed is a Protective area that you can get a good night’s rest in is incredibly valuable for your own health and well-being.
Never cross the bed perimeter without first stripping off all of your clothes. When you are going through the process of ridding your home of bed bugs, you want to always assume that clothes you have been wearing around your home are contaminated with bed bugs. Are there actually bed bugs on your clothes? Probably not, but it’s impossible to completely rule out so for the purpose of keeping your bed a Bed Bug Free Zone, you must think of anything you are wearing as potentially contaminated. The only clothes that are protected are those that have been laundered/heat treated and which are subsequently stored in sealed plastic bags. Before going to your bed, strip off all of your clothes outside of the perimeter and then, only when you are totally naked, step over the line of diatomaceous earth to get into bed. Have your freshly laundered/heat treated pajamas in a sealed plastic bag waiting for you on your bed.
Hint: We love giant Ziplock bags for storing freshly laundered/heat treated clothes. When sealed shut the bags are impermeable to bed bugs. And they also open easily, allowing convenient access to your clothing.
Disclaimer: Some of the procedures outlined in this guide may be tricky and should be undertaken at the readers own risk. Readers should consult all material data sheets for any products they use in their own attempts at pest control and consult with the manufacturers of all products regarding best usage practices. This guide should be construed as theoretical advice. ZappBug and its employees will not be held responsible for any injury due to the advice offered herein. This guide cannot be construed as formal advice and ZappBug will not be held liable in any instance of an action resulting from this story. This disclaimer assigns the readers all responsibility for their own decisions.
